
PAIRING FAILED • CODE MISSING • SEARCHING
Shizuku Pairing Code Not Working? Complete Fix Guide
If Shizuku will not accept the six-digit code, keeps searching for the pairing service, or shows “Pairing failed,” follow these fixes in order. Most failures come from an expired code, hidden notification input, restricted background access, or a changed Wi-Fi session.
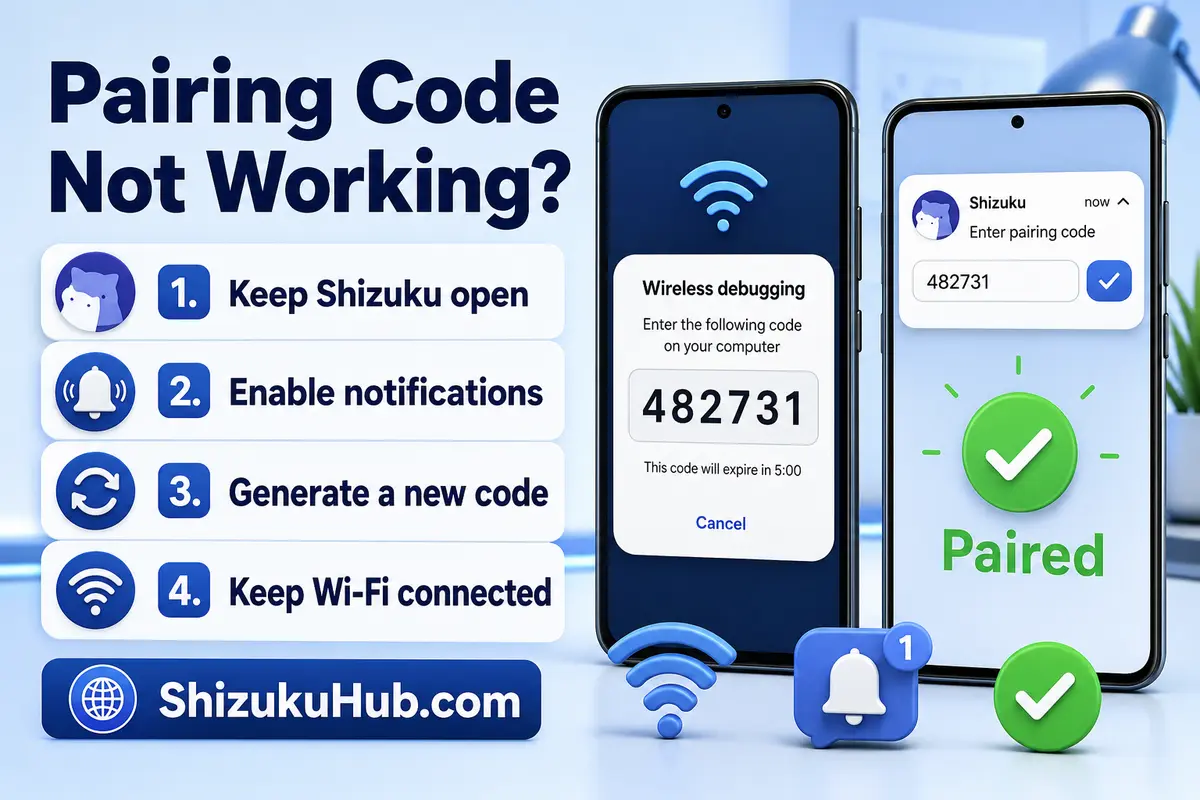
Quick fix: generate a fresh code and keep both screens open
Open Shizuku first and tap Pairing. From Shizuku, open Developer Options, enter Wireless debugging, and tap Pair device with pairing code. Do not close that system dialog. Pull down the notification shade, expand the Shizuku notification, enter the new six-digit code, and submit it before the code expires. Then return to Shizuku and tap Start.
1
Use a fresh code
A pairing code is temporary. Close the old dialog, open “Pair device with pairing code” again, and enter only the newly generated six digits.
2
Keep Shizuku active
Begin pairing inside Shizuku before opening the Android code dialog. Aggressive background controls can stop discovery when Shizuku is hidden.
3
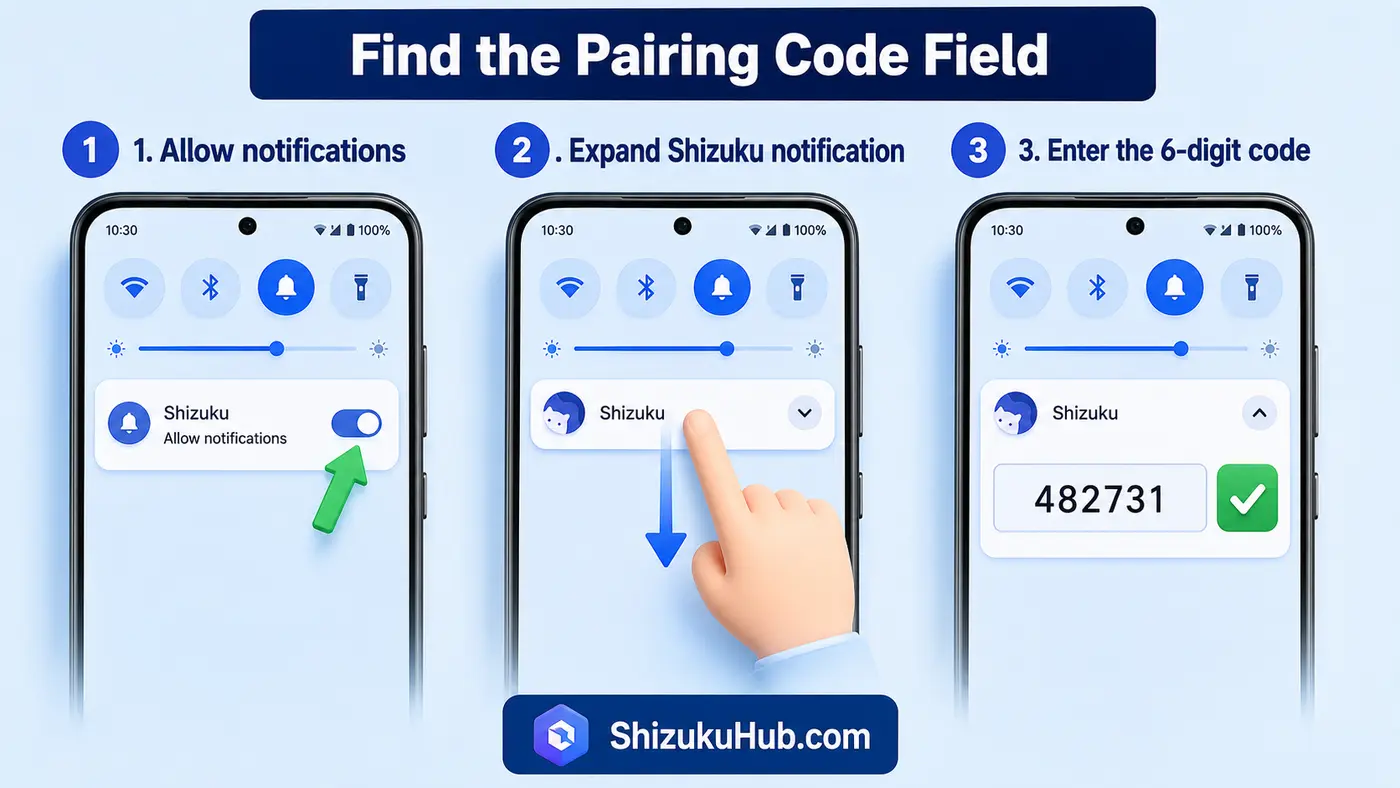
Expand the notification
The code field is inside the Shizuku notification on many phones. Enable notifications and expand the notification instead of tapping its compact banner.
Why is the Shizuku pairing code not working?
Wireless debugging creates a temporary local ADB pairing session. Android displays a six-digit code and a pairing address, while Shizuku searches for that service on the local network. The code can fail when it expires, the pairing window closes, Shizuku loses background or local-network access, Wi-Fi changes, or Android retains a broken paired-device entry.
If wireless debugging has never worked on your phone, use our complete Shizuku wireless debugging guide first. It explains Developer Options, the correct pairing order, and how to start the service after pairing.
Fix Shizuku pairing code not working step by step
Apply these fixes in order and test after each one. You usually do not need to reset the whole phone.
- Update Shizuku: Install version 13.6.0 from this page. Older builds may have compatibility problems on newer Android updates.
- Enable notifications: Open Settings > Apps > Shizuku > Notifications and allow notifications. The pairing-code input may appear only when the notification is expanded.
- Allow background activity: Set Shizuku battery usage to Unrestricted or allow background activity temporarily. This prevents “Searching for pairing service” when you leave the app.
- Keep Wi-Fi connected: Wireless debugging needs an active Wi-Fi network. Do not switch Wi-Fi, enable a VPN, or move between access points while entering the code.
- Generate a new code: Close the previous Android pairing dialog and tap “Pair device with pairing code” again. Enter the new code immediately.
- Toggle Wireless debugging: Turn Wireless debugging off, wait a few seconds, turn it on, and restart pairing from Shizuku.
- Forget paired devices: In Wireless debugging, remove old paired devices when available. Start a clean pairing session afterward.
- Restart Shizuku and the phone: Force stop Shizuku, reopen it, and retry. If Android’s wireless ADB service is stuck, reboot once and repeat the fresh pairing sequence.
No place to enter the pairing code
On some Android skins, the Shizuku notification first appears as a short banner without a visible text field. Allow notifications for Shizuku, swipe down to open the full notification shade, and tap the small arrow or expand gesture on the notification. The “Enter pairing code” field should appear inside the expanded notification.
If notification content is hidden on the lock screen, unlock the phone before expanding it. Also disable Focus mode, Do Not Disturb restrictions, or notification minimization for Shizuku while pairing.
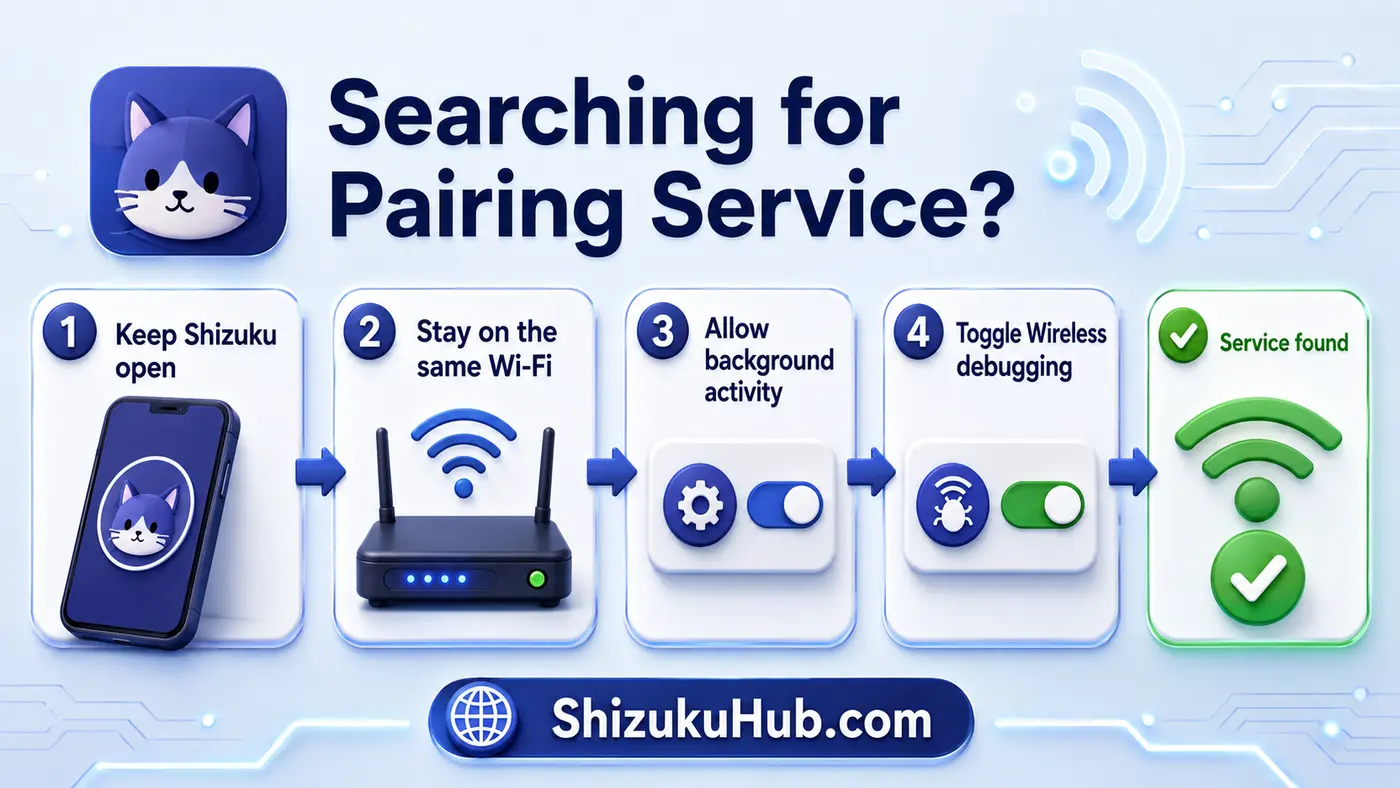
Stuck on “Searching for pairing service”
This message means Shizuku has not discovered Android’s wireless ADB pairing service on the local network. Keep Shizuku running in the background, remain connected to Wi-Fi, and open the Android pairing-code dialog only after starting pairing in Shizuku.
If the message continues, remove battery restrictions, allow nearby-device or local-network access when your Android skin provides such controls, disable VPN or private networking temporarily, and toggle Wireless debugging. You can re-enable your normal network tools after Shizuku is paired and running.
01
“Pairing failed” immediately
The code probably expired or the pairing dialog closed. Generate a new code, keep the dialog open, and submit it without switching networks.
02
Code accepted but not paired
Check the Wireless debugging paired-device list. Remove the old Shizuku entry, toggle wireless debugging, and pair again.
03
Paired but service is stopped
Pairing and starting are separate actions. Return to Shizuku after pairing and tap Start. Toggle wireless debugging if Start fails.
04
Works until reboot
This is normal for the standard no-root method. Open Shizuku and start the service again after Android restarts.
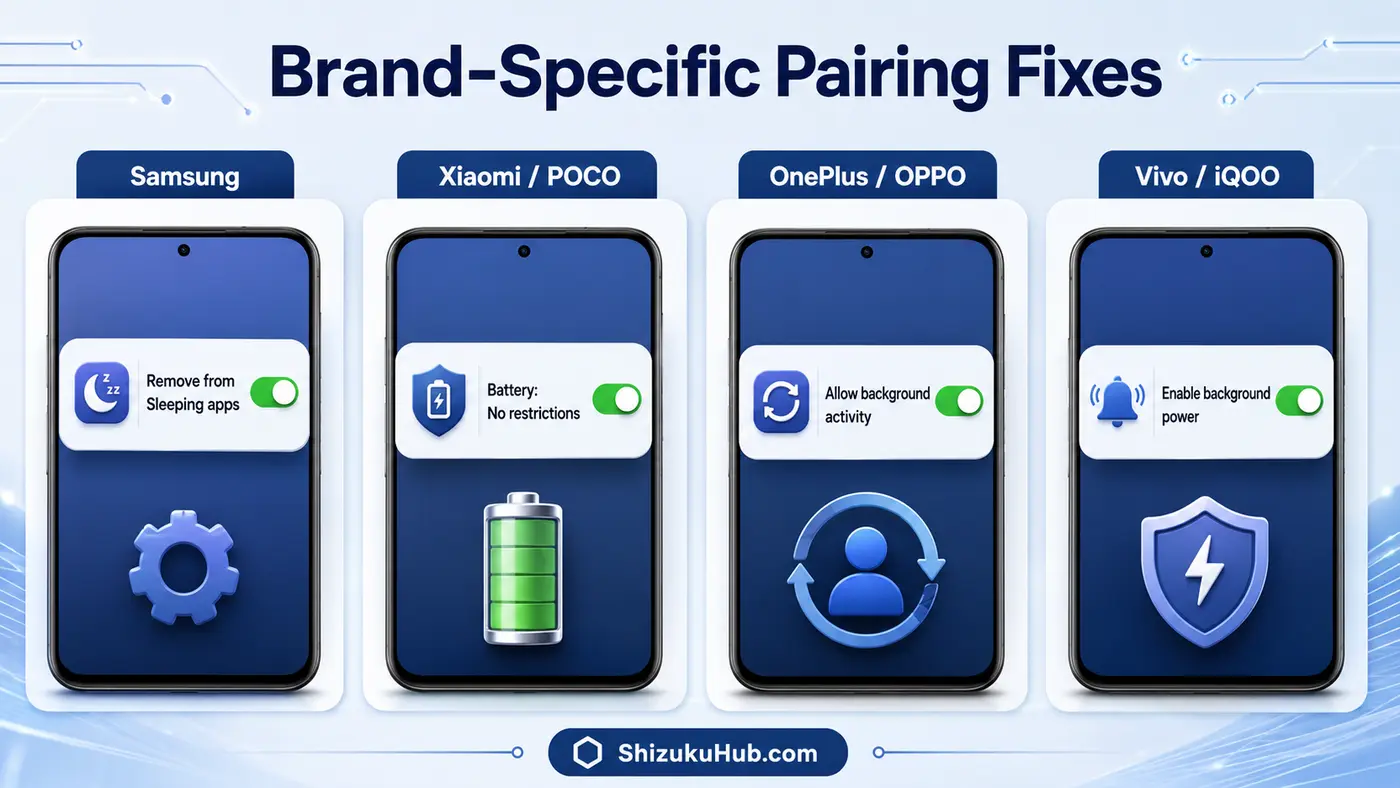
Samsung, Xiaomi, OnePlus, OPPO, Vivo, and other phone fixes
Samsung Galaxy: Allow Shizuku notifications and remove it from Sleeping apps. Keep Wi-Fi on while pairing. If the notification is minimized, change its notification category to Alert.
Xiaomi, Redmi, and POCO: Set battery saver to No restrictions, allow Autostart temporarily, and keep Shizuku in recent apps. HyperOS or MIUI may stop local discovery as soon as the app moves to the background.
OnePlus, OPPO, and Realme: Allow background activity and expand the full notification shade. OxygenOS and ColorOS can display the Shizuku notification as a compact banner that hides the input field.
Vivo and iQOO: Enable background power consumption and notifications. If searching never finishes, lock Shizuku in recent apps during the pairing process.
Pixel and near-stock Android: Toggle Wireless debugging, forget stale paired devices, and generate a fresh code. The standard notification workflow normally works without additional battery settings.
Computer ADB fallback when on-phone pairing still fails
A computer provides a reliable fallback because it bypasses Shizuku’s on-phone discovery step. Enable USB debugging, connect the phone, authorize the computer, and run the start command shown inside Shizuku. The service will still need to be started again after a reboot.
For advanced wireless ADB diagnosis, this Stack Overflow wireless pairing discussion demonstrates how Android’s pairing address, connection address, and temporary code are separate values. Use our on-page method first; the external resource is useful when testing with platform tools.
If you want the easiest non-root comparison before using a computer, see Shizuku without root. Android 15 and 16 users can also check the version-specific compatibility guide.
After pairing: start Shizuku and authorize an app
A successful pairing does not automatically mean the Shizuku service is running. Return to Shizuku, tap Start, and wait for the status to show that Shizuku is running. Only then open a companion app and approve its permission request.
If pairing succeeds but a companion app still cannot connect, confirm that the app supports the installed Shizuku version in our Shizuku supported apps guide.
Safety checklist while troubleshooting
- Use the direct APK provided on this page. Our file is VirusTotal scanned and tested on real Android devices.
- Keep Google Play Protect enabled during installation and troubleshooting.
- Do not share a live pairing code. It is temporary but should still be treated as a local authorization code.
- Remove paired computers or devices you no longer recognize from Wireless debugging.
- Approve Shizuku access only for companion apps you intentionally installed.
Shizuku pairing code FAQs
Fix the pairing code and start Shizuku
Use a fresh code, keep Shizuku active, expand its notification, and stay connected to Wi-Fi. Once pairing succeeds, return to Shizuku and tap Start.